ShopDreamUp AI ArtDreamUp
Deviation Actions
Description
Phew... This took me like forever...
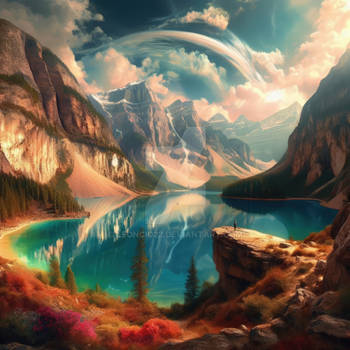
Vue-Matte-Painting-Terraspace-Thingie
Started as a Vue experiment and ended like this.
Applications used: Vue, GeoControl, Photoshop, 3ds Max
Enjoy!
Vue-Matte-Painting-Terraspace-Thingie
Started as a Vue experiment and ended like this.
Applications used: Vue, GeoControl, Photoshop, 3ds Max
Enjoy!
Image size
1920x817px 1.26 MB
© 2009 - 2024 hoevelkamp
Comments13
Join the community to add your comment. Already a deviant? Log In
Certainly a new way of utilising Vue for you, I've tried similar methods myself and it's fun to "matte-paint" several images together than just try and get the whole thing right off the bat in Vue alone, also lets you get more practice out of the Photoshopping aspect of it too <img src="e.deviantart.com/emoticons/s/s…" width="15" height="15" alt="
My crit here, and this is something I hope everyone can read since I see it a lot, is the usage of cloud-brushes or photo's that have been turned to black and white and set to "screen"...I'm assuming you used a brush here, when doing so, it's a good way to fill your sky with relaistic clouds, but that alone causes them to lack "volume" in the shadowed areas that like here - appear clear when they should be grey.
I found a way to combat this - stamp your cloud in white on a new layer, duplicate that layer about 4 times until you get a solid-white silhouette of the clouds, then merge all but one together and with the "heavy" merged cloud layer, darken it to near-black and put it under the original once-clicked white cloud layer, this will create a cloud with more body to it and nice shadowed areas visible too, a weird outline in black will appear around it, so before merging what should be just two layers by now - erase the edges of the black cloud underneath and you'll know when it looks good naturally <img src="e.deviantart.com/emoticons/w/w…" width="15" height="15" alt="
It takes a bit longer this way, but makes a great difference, then it's just some minor painting and other things to get it to your liking. I could even post a quick demo in my scraps if you want (not so much a tutorial, just a "with" and "without" that method scene) <img src="e.deviantart.com/emoticons/s/s…" width="15" height="15" alt="
Anyway, asides from the parially clear-looking clouds, this is fantastic! <img src="e.deviantart.com/emoticons/c/c…" width="25" height="25" alt="


